• Skip to main content
  • Account
  • Announcements
  • Contact

RSVP Pro Plugin

Easy RSVP and Event Management for WordPress

  • Features
  • Documentation
  • Use Cases
  • Pricing

Cristian

April 12, 2019 By Cristian

Enabling a CAPTCHA

The RSVP Pro plugin has the ability to enable Google’s ReCAPTCHA when an attendee is RSVP’ing. This is useful when you have an open attendee event that shows the registration form right away the ReCAPTCHA can help prevent automated spam submissions from being entered.

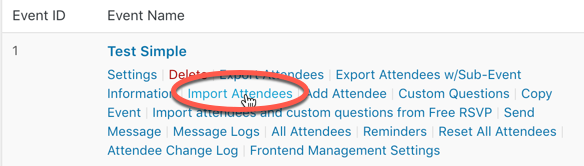
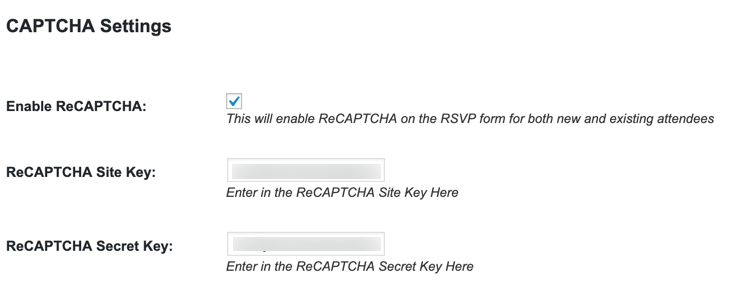
To enable the ReCAPTCHA go to your event’s settings area and click on the “Front-End” tab and then scroll down to near the bottom. There is an area labeled “CAPTCHA Settings” that looks like:

To generate the ReCAPTCHA keys go to http://www.google.com/recaptcha/admin you should see a “+” sign to create a new site.

When the “+” has been clicked you will then see a page that looks like the below one.

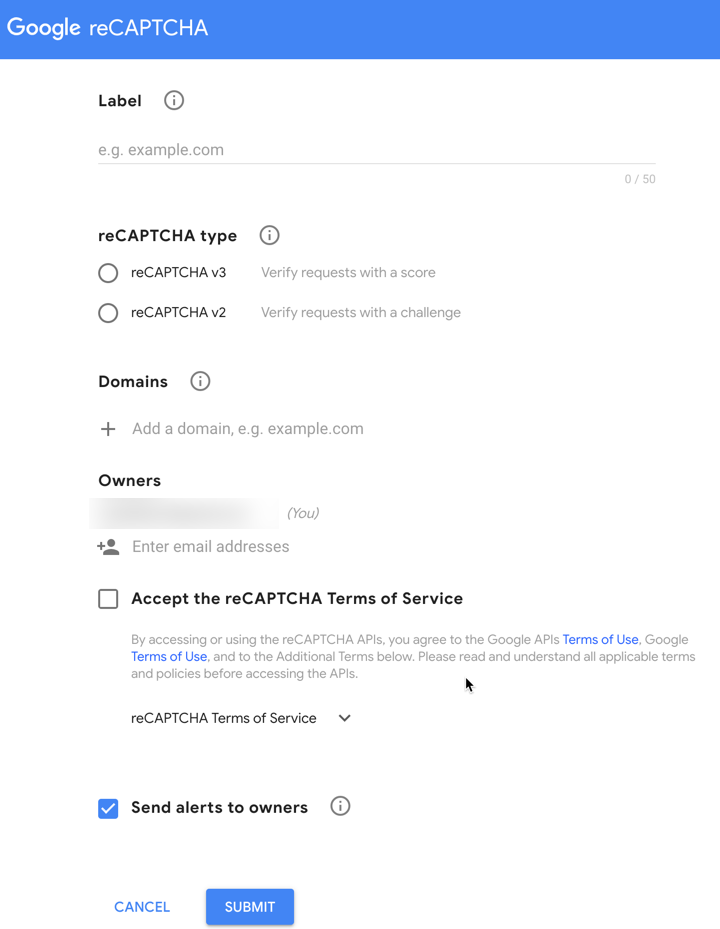
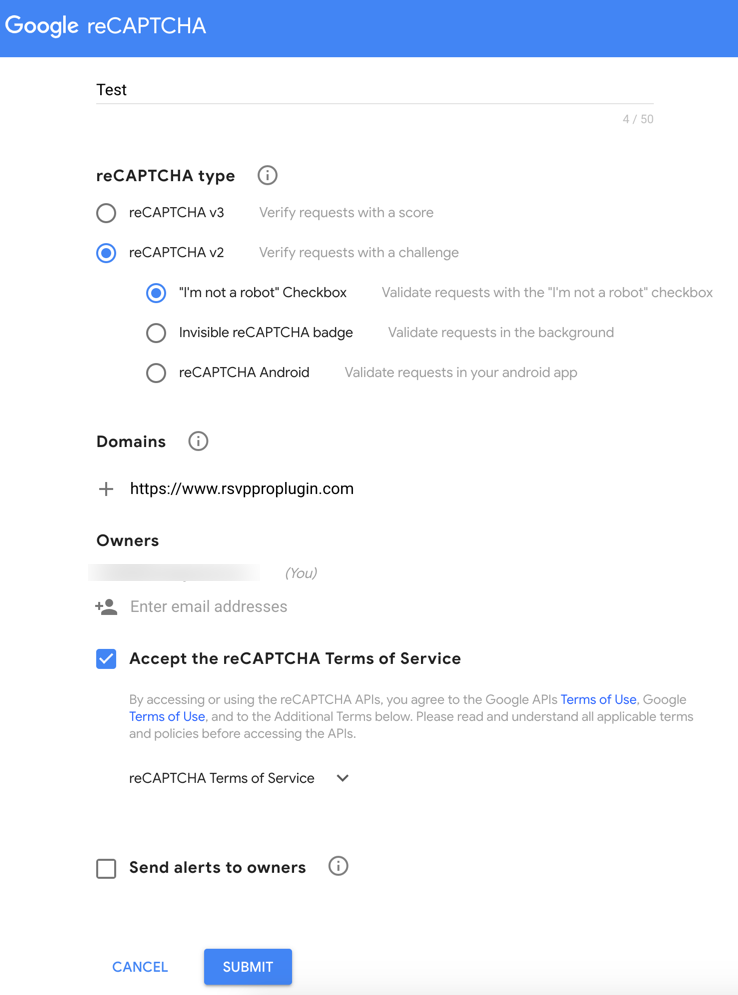
Put in a label that is descriptive for your use case, select “reCAPTCHA v2”, then “I’m not a robot”, enter in the domain(s) that will be using the CAPTCHA, accept the terms and then click submit. Similar to this form:

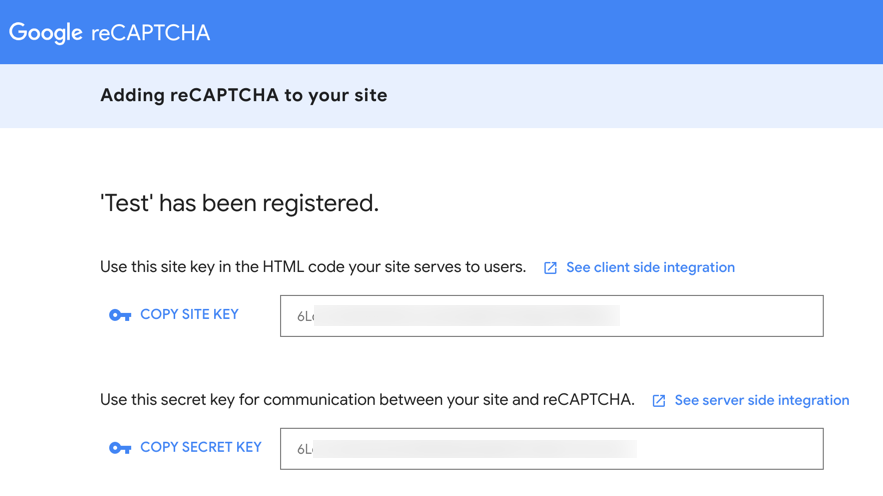
The next page will show the keys we need for the RSVP settings. Copy them into each RSVP Pro event setting with a similar name.

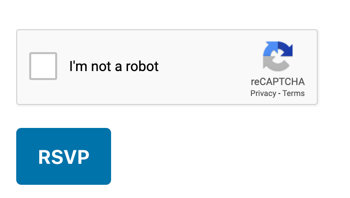
Then just check the box and click “Update Event.” Now if you go to the front-end RSVP form and try to RSVP you should see a ReCAPTCHA box similar to:

If you have any questions or run into problems, please reach out and contact us.

April 1, 2019 By Cristian

Custom Question File Type & RSVP Pro Frontend Management

This past month two feature releases occurred — the first for all RSVP Pro plugin customers I have released a file custom question type. Now when adding a custom question, there is a “file” question type which will allow your attendees to upload files that you might need for your event.

The second release was our first extension for the RSVP Pro plugin the RSVP Pro Frontend Management extension. This extension allows you to surface the ability for other people to manage the attendee list for a specific event. More information can is at the extensions information page.

Are there other features or extensions you want to see added to the plugin? Please let us know!

Filed Under: Uncategorized

November 22, 2018 By Cristian

New RSVP Pro Attendee Import Workflow

One of the frequent support requests I receive for the RSVP Pro plugin is questions surrounding the attendee import functionality. When the import process was created eight(!) years ago. You had to have a specific file layout in your spreadsheet, and it was rather fragile. The import process was way overdue for an overhaul.

With the release of version 3.8.7 the import process is much easier to use. Here is a video showing the new workflow when importing attendees.

With the new process as long as you have your attendee information in a CSV or Excel file, you can import it into your event. The only required field is either a first OR last name. You can read more details in the updated documentation.

I hope it improves your the workflow. If you have any feedback, please contact me. I love to hear from my users.

Filed Under: RSVP Pro Plugin

November 16, 2018 By Cristian

Importing Attendees

The ability to import attendees into an event is a commonly used feature of the RSVP Pro plugin. To make the import process as flexible as possible, we created a two-step process the first is where you upload the file, and in the second step, you map the columns in your file to attendee fields. This how-to talks about how this ability works, the features and common questions.

File Type and Format

The following file formats are allowed: Excel (xls or xlsx), CSV and ODS. The import process assumes the first row in the import file is a header row that labels each column. This row will not be imported into the event, but it will be used on the second step of the import process to map columns in the file to attendee fields.

How to Import Attendees

The import process is a two-step process. The goal of this process is to make it as flexible as possible. To import attendees first go to the event listing area and click on “import attendees” under an event.

The first step of the import process looks like:

Here you select the file you wish to import. You can also check “delete existing attendees on import.” However, attendees will not be deleted until you finish step two. After you have selected the file and are ready to map your file to attendee fields hit the “next” button. This will take you to a screen that looks like:

On this step, we map our import file’s columns to the attendee fields. In the above screenshot, there is a column with a label of “First Name” so we select that for the “First name” attendee field. We also have a field in the file called “Email” which we map to the “Email address” field. Each attendee field will have a drop down next to it that allows you to select which column in the import file to pull information from.

Once we have our file mapped, we are ready to import the data. Just click the “import attendees” button and your attendees will import. When it is done importing you will see a message like:

That is all you have to do to import the attendees for an event. Below is additional information on available attendee fields.

Fields Available for Import

There are many attendee fields that you can import. This area details all of the different fields.

Required Fields

There are two possible required fields, but only one has to be selected for an attendee to be imported. This means when importing you can specify the first and last name but if you don’t have that information you can also import with just the first OR last name.

  • First name – The attendee’s first name.
  • Last name – The attendee’s last name.

Additional Attendee Fields

  • Email address – The email address for the attendee.
  • Salutation – The salutation for the attendee. The only allowed values are the ones specified in the salutation event option.
  • Suffix – The attendee’s suffix.
  • RSVP status – The RSVP status for this attendee, valid values are: Yes, No, No Response, Maybe, and Waitlist.
  • Associated attendees – This is a comma-separated set of names (first and last) that the attendee should be associated with for the event. When the attendee RSVPs they will have the chance to RSVP for the associated attendees. If a name doesn’t exist already in the associated attendees list, it will get created for the event.
  • Passcode – A passcode the attendee should use to RSVP.
  • Custom message – The custom welcome message the attendee will see when they RSVP.
  • Number of guests allowed per attendee – The number of guests this attendee is allowed to bring to the event.
  • Note – An internal note for this attendee.
  • Primary attendee – If this attendee is the primary attendee. Valid values are Y or N. If this person is the primary attendee even if an associated attendee tries to RSVP it will show this person’s name at the top of who will be RSVP’ing.
  • Group ID – A group ID that can be used to group people. This is useful if you have multiple groups that have attendees with the same names. Each group will be considered separate so two people but in different groups can be added to the event.

Custom Question Attendee Fields

For each custom question for an event, you will have the ability to specify two possible import file columns.

  • Value for the custom question – This is the value that should be stored as an answer to the custom question.
  • Access to the custom question – If the custom question has a permission level of “select people” then we have the option to map an import column to grant access to custom question. Acceptable values are Y or N. If no value is specified, then attendees will not have access to the custom question.

Access to Select Event Fields

If an event or sub-event has access defined as “select,” then there is the ability to select an import file column to grant access for the attendee to the event. Acceptable values are Y or N. If no value is specified, then attendees will not have access to the event.

Common Questions

How Does the Duplicate Check Work for Importing Existing Attendees?

During the import process, we attempt to avoid creating duplicate records. The process will check the existing attendee list to see if a first name, last name, and email OR passcode match with the current row trying to be imported. Also, if a group ID is specified, then that is used to limit further the scope of the check used to see if an attendee exists this is useful if you know that there will be multiple attendees with the same name if an attendee does exist then they will not be imported. However, the associated attendees and custom question-related columns will be imported/updated for that user.

If you have questions about this feature or have suggestions on how to improve it, please get in contact with us. We love to hear from you.

October 27, 2018 By Cristian

2018 Year-End Features

Over the past few years, I have written a lot of changes some big and some small to the free and pro version of the RSVP plugin. However, unless you comb through the changelog or if you were involved in the change yourself, it was doubtful you knew about the changes. Going forward when significant features are planned or are getting close to release I am going to start to write about them. Speaking of which…there are two significant changes that I want to write about now. I plan to have these changes released by the end of 2018.
Improvements in the Import Process
Currently, when importing attendees into an event, a person has to create a specific information layout in the Excel file. This can be time-consuming and error-prone. That will be changing soon as there will now be a two-step process where you can specify which column in the Excel file goes to which field the value should go to. The hope is to make it less time consuming and more accessible for people to use.
Front-end Attendee Management
With the business version of the plugin, you get an additional plugin that allows you to add attendees on the front-end. That is a pretty limited feature, but it is the start of something bigger. Soon there will be the ability to manage attendees via the front-end. This will make it so your clients can maintain the attendee list without having access to the admin area of their WordPress site.
Are there any other features you would like to see get added or improved in the plugins? If so let me know.

Filed Under: Uncategorized

  • « Go to Previous Page
  • Go to page 1
  • Go to page 2
  • Go to page 3
  • Go to page 4
  • Interim pages omitted …
  • Go to page 9
  • Go to Next Page »
  • Account
  • Announcements
  • Contact

A MachoThemes Product