• Skip to main content
  • Account
  • Announcements
  • Contact

RSVP Pro Plugin

Easy RSVP and Event Management for WordPress

  • Features
  • Documentation
  • Use Cases
  • Pricing

Cristian

November 22, 2016 By Cristian

RSVP Email Notifications

Both versions of the RSVP plugin support notifications when an attendee RSVPs. Notifications can go to attendees and to people running the event. This how-to goes over the setup of notifications and what the differences are between the free and the pro versions.

Basic Setup for RSVP Notifications

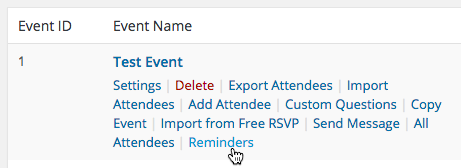
The basic setup for email notifications is similar for both versions of the plugin.  All options in the free version can be found in “RSVP Options” under the “RSVP” menu item of the admin area and in the Pro version all notification options are found under the “Notifications” tab in event settings for each event. To setup the basic RSVP notification ability, there are a few options to be aware of:

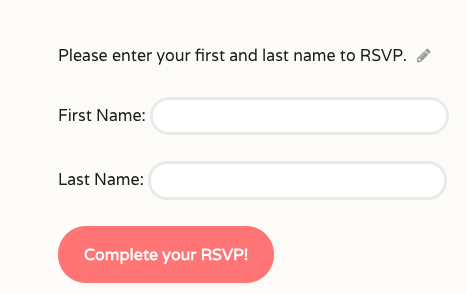
  • “Email guests when RSVP is complete” (Pro version) / “Send email to main guest when they RSVP” (Free version): When this option is checked, and as long as an email address is specified, the person who is RSVP’ing will be sent an email with his or her RSVP details and the details of any associated attendee. The big difference between the pro and free version is that the pro version has all the RSVP fields in the email while the free version only has the basic ones.
  • “Notify When Guest RSVPs” (Free and Pro version): If this option is checked the person running the event will be notified of an attendee RSVP’ing. The email address that gets notified will be either the site admin (specified in Settings -> General for the WordPress install) or if the option “Admin notification email” (Pro version) / “Email address to notify” (Free version). This email will include the same information as what the attendee receives.
  • “Email Text” (Free and Pro version): This option adds the entered text into the top of the email that is sent to attendees. This text will not be included in the emails that go to admins.

The above explanations summarize the basic functionality for sending RSVP notifications.

Emails Not Being Sent?

A common question we receive is related to the email notifications being sent, or not sent. Both plugins use the standard way and method for WordPress to send out emails. The first step is to make sure WordPress is setup to send emails.  You can use this article for information on how to check your site setup.   If the setup is correct, you should check to see if the notification emails are being sent to your spam folder or are getting caught in a spam filter.  If neither of these things fix the problem, please get in contact with us and we will help.

Additional Notification Features in RSVP Pro

The Pro version of the RSVP plugin has the following additional notification features:

  • “Email address notifications could come from”: With this setting, an email address can be used as the “from” address for notifications. There are multiple ways an email address can be entered, either a normal address like – test@test.com – or with a name followed by the email address like – Test Email <test@test.com>.
  • “CC Associated Attendees”: When this option is checked, associated attendees that have email addresses entered will be CC’d on the attendee notification emails.
  • “Include an ICS file as an attachment”: This will include a calendar invite file as an attachment to the attendee notification email. The general event information such as the start and end times and location need to be filled out for this invite to be included.
  • “Email addresses to BCC when attendees RSVPs”: This option allows for specific email addresses to be blind carbon copied for all attendee RSVP confirmation emails. It is possible to specify multiple email addresses by separating them with a semi-colon (;).
  • “Email subject for the attendee email”: By default, emails sent to attendees when they RSVP has a subject of “RSVP confirmation.” This option allows you to specify a different subject that may be more relevant to the event.
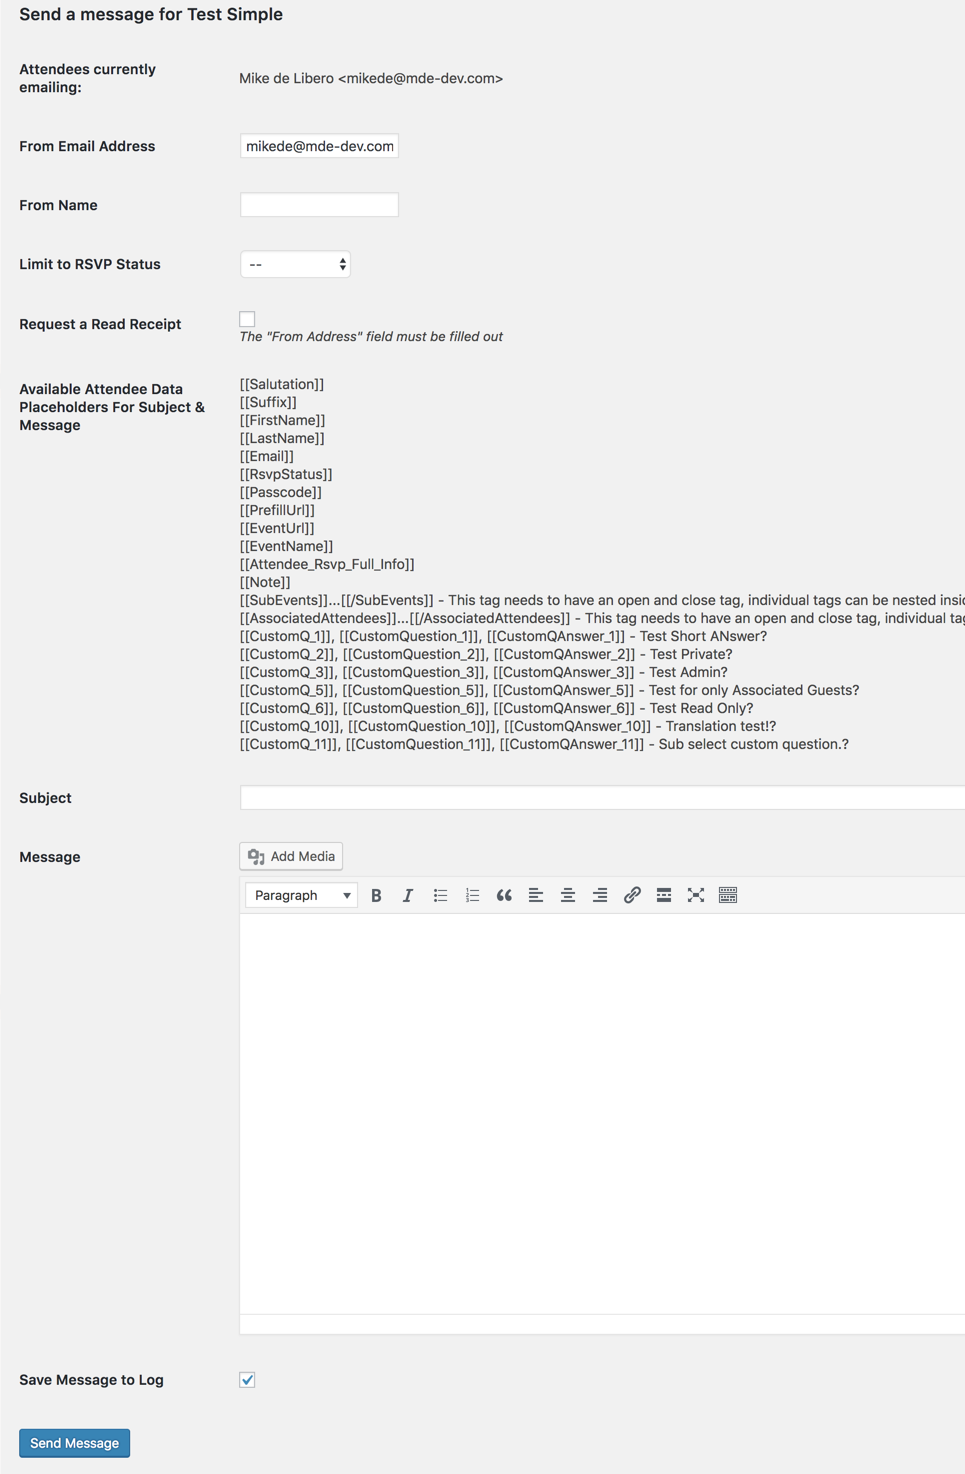
  • “Email body for the attendee email”: This feature allows you to completely replace the attendee notification email. Right above this feature is a list of “codes” that can be put into the email and will be replaced with attendee or event information. The email will be sent as HTML so it is possible to add in links and images that will be pulled from the WordPress install.

November 22, 2016 By Cristian

How to Setup “Checking-In” Attendees with the RSVP Pro Plugin

The RSVP Pro plugin has the ability to record the attendance for an event. This ability exists both in the admin area and also can be made to appear on the public attendee list. Let’s first look at how we can enable this functionality in the admin area.

Enabling the Ability to Check-in Attendees in the Admin Area

To enable this functionality, go to a top-level event’s settings page and click on the “General” tab. Find and check the option called, “Allow Attendee Check-ins.” After ensuring the option is checked, click “Save.”

Once the functionality has been enabled we can check-in attendees from two different spots of the admin area: the attendee list for the event (or the sub-event’s attendee list) and also in an attendee’s edit screen. You will also see the checked-in status on the attendee list, like the screen-shot below:checkin_attendeelist

You can either check-in a group of people at once, or check them in individually. To check-in a group of attendees, go to your event attendee list and place a check next to the individuals you wish to check-in. Then click on the bulk actions drop down menu and select, “Check-In.” The bulk action check-in option will only be available if ability to check-in has been enabled as discussed at the beginning of this article.checkin_bulk_action

Once you select that action just click “Apply” and the attendees will now be checked in.

Alternatively, you could click on an individual attendee to go to their edit screen and toggle the checkbox, as below:attendee_edit_checkbox

Besides the check-in status showing up in the attendee list it will also be in a column in the exported data.

Enabling Public Attendee List Check-Ins

For some events, you may want attendees to check themselves in, or you may want another designated individual to take attendance without giving them admin access to your site. Using the public attendee list short code, you can enable check-ins from the front-end. To add this functionality, go to a top-level event’s settings page and go to the “Public Attendee List” tab. The screen shot below shows the options that are available:attendee_list_checkin_settings

The primary option is “Allow attendees to check-in.” If this is checked, the ability to check-in will be on the public attendee list. When this option is checked and the general “Allow Attendee Check-Ins” option is not checked we will turn on the admin specific option as well. This allows for all functionality to exist in this case. The other two options change the text of the button the user will see when they check-in from the attendee list.public_attendee_list_checkin

For each event and sub-event, the attendee has the ability to check him or herself in to the event.

If you believe anything is missing or run into any problems using this functionality, please feel free to contact us!

November 11, 2016 By Cristian

Installing the Free Version

This is a step-by-step guide on how to install, activate, and get the RSVP free plug-in up and running.

  • Install the plug-in via the WordPress admin area by going to “Plugins” and clicking on, “Add New.”  Search using the keyword, “RSVP” and click “Install Now” after finding the plug-in.  When searching, the plug-in will appear as seen below:rsvp_plugin_search_result
  • Once it is installed, the “Install Now” button should change to “Activate”: rsvp_free_activate
  • Click the “Activate” button.  Once activated, the RSVP plug-in will show up as a new option in the admin area.  It will look as follows: rsvp_free_menu

At this point the plug-in is ready to use.  By default, the plug-in operates with a set attendee list meaning that only people on the list can RSVP. Before adding attendees, it is good to setup the initial RSVP options and get the form visible on the front-end.

Basic RSVP Options

From the admin area go to “RSVP Plugin” and then “RSVP Options.”  Once you are there, only two fields at the top need to be set: “RSVP Open Date” and “RSVP Deadline.”rsvp_free_date_setup

The “RSVP Open Date” field specifies the start date of when people can start to RSVP for the event. The “RSVP Deadline” field specifies when people can no longer RSVP for the event. There are many more options listed, however they are not required to make a functional RSVP area for your site. Once the dates are entered scroll to the bottom and click the “Save Changes” button.

Setting Up the Front-End

In order to get the RSVP plug-in to be visible to your invitees, a short code needs to be placed on the page or post that you want the form to be displayed. So, go to the admin area of a page or post that people will use to RSVP from and add in the short code of [rsvp].  The page editor will look something like this:page_rsvp_shortcode

Create the page or save it if the page already exists. If the current date is between the RSVP open and deadline when viewing the page, you will be presented with a form that asks for a first and last name.initial_frontend_form_for_free

The form will look differently depending on the theme installed but the fields will still be the same. At this point, no one would be able to RSVP as a guest list has not been made.

Adding Guests

There are two ways to add guests: importing an Excel file or by manual entry.  The import functionality is documented in this article.  To manually enter guests, go to the admin area and then click on “RSVP Plugin” and then “Add Guest.” A form will be displayed allowing for guest information to be entered. The only fields required are the “First Name” and the “Last Name.”rsvp_free_add_attendee

Once those fields are entered just click “save” and the following confirmation message will be displayed:rsvp_free_add_attendee_confirmation

At this point we can go back to the front-end and RSVP for the new attendee we created. Happy RSVP’ing!

July 19, 2016 By Cristian

Setting up Reminder Notifications

Event Reminder Notifications

The RSVP Professional and Business versions of the plugin have the ability to send out automatic reminders to all or some of your attendees.  For each main event it is possible to setup multiple reminders.

Creating and Updating a Reminder

Creating and updating a reminder are basically the same task. By either clicking an existing reminder or clicking the “Add New” button, you will be sent to a page with the following form:

reminder_form

Most of the form fields are required in order for the reminder to work correctly. Let’s go over each form field to understand what is expected.

Reminder name: This is the name of the reminder; it will only be shown in the admin area.

Reminder time: Two fields are required for the reminder time.  The first is time unit quantity.  The quantity is expected to be a round numerical value, suck as 2 or 10.  The second is the time unity, which is one of the values in the drop down.  If you set the reminder time to a value of “2 weeks,” a reminder would be sent two weeks prior to the event.

Send reminder on: This field is used to enter a specific date on which the reminder will be sent.

Only send reminders to selected statuses: This allows the reminder to be sent only to attendees with specific RSVP statuses. For example, if you wanted to remind someone to RSVP two weeks before the event you might select only the status of ‘No Response.’ All attendees will receive the reminder if no specific status is selected.

Reminder subject: The subject of the email that will be sent.

Reminder message: The body of the email that will be sent.

Reminder Management

To access reminders, hover over your event name on the “List of Events” page and click on the “Reminders” link.

event_reminders_link

This will bring you to the reminder list area:

reminder_list

For each reminder, the following information is displayed:

  • Reminder Name: The friendly name of the reminder, this is only displayed in the admin area.
  • Time Qualifier: The qualifier is used to calculate when the reminder should be sent.
  • Time Period: The period or length used to calculate when the reminder should be sent.
  • Relevant RSVP: This displays if the reminder restricts which RSVP statuses receive the message. For example, you might want to only remind people who have yet to RSVP.

Also in this area you can delete a reminder by clicking the checkbox and selecting “Delete” from the “Bulk Actions” area and then clicking “Apply.”

Specifying the Event Date

The event date is chosen based on two different fields for an event. If the “Event Start Date” is specified under the “General Event Information” area, then that is the date that will be used in the calculations for when to send a reminder. However, if that field is not specified than the “RSVP Close Date” is used instead. This was done since the “Event Start Date” is not always specified. The date that is used for calculating the reminder is shown both on the reminder list and in the reminder form.

May 4, 2016 By Cristian

Sending Emails to Attendees

The RSVP Pro plugin has many different ways to send emails to all or selected attendees. This document details those two methods.

Specifying Which Attendees Receive A Message

The first way is from the event list area. Under each event there is a “send message” link, as shown below:send_message_event_list

When you use this link to compose a message, you can send a message to all attendees who have entered in an email address.

The second way to send an email is from the attendees list screen. From here, you can select the desired attendees and then choose the bulk action of “Send Message.”bulk_actions_send

This can be useful if you only want to send a message to a designated group of people.

The last way to send a message is when you are a specific attendee’s edit screen there is a button at the bottom to “Email Attendee.”

Sending the Message

Once you have selected a group of attendees to receive your email, you will be taken to a new screen to write your message. An example is below:

The “From Address” input allows you to specify the “from” email that the message will show as being sent from. Depending on your hosting provider and how your blog is setup, this field might be ignored in which case the from address your hosting provider setup will be used. It also raises the chances of making the email look like spam. It can be useful if you are trying to have the replies of the emails go directly into your inbox.

The “From Name” input specifies the name of the email comes across as this will show as the friendly name instead of the just the email address.

The “Limit to RSVP Status” is the only filtering option on this form. This allows you to only send a message to a subset of the attendees who have a given RSVP status. For example, if you want to remind everyone that has not RSVP’d yet that they should do so soon, you would select the RSVP status of “No Response” and the message would only send to those attendees who have not RSVP’d.

The “Request a Read Receipt” checkbox is to specify if the sender should receive a read receipt from the message that is sent.

The next area is a list of placeholders that can be used in the subject or the body of the message. These placeholders will be replaced with the actual value when sending the message. Each placeholder is described below:
– [[Salutation]] : The salutation of the attendee.
– [[Suffix]] : The suffix of the attendee.
– [[FirstName]] : The first name of the attendee.
– [[LastName]] : The last name of the attendee.
– [[Email]] : The email of the attendee.
– [[RsvpStatus]] : The RSVP status for the attendee.
– [[Passcode]] : The passcode for the attendee.
– [[PrefillUrl]] : A URL the attendee can click to take them right to the RSVP form skipping the attendee look-up step.
– [[EventUrl]] : The URL that an attendee can use to RSVP to the event.
– [[EventName]] : The name of the event.
– [[Attendee_Rsvp_Full_Info]] : This will be replaced with all of the information for the attendee. It will be the exact same output as what is sent to attendee when they RSVP.
– [[Note]] : The note the attendee typed in when RSVP’ing.
– [[SubEvents]]…[[/SubEvents]] : Nested tags can be put in here to show the information for any sub-events this event might have.
– [[AssociatedAttendees]]…[[/AssociatedAttendees]] : Nested tags can be placed in here to display information for associated attendees.
– [[CustomQ_XXX]] : The answer to the custom question related to the id (represented by XXX).

Using these placeholders allows you to make the subject or the message be different per-attendee. For example, even if you send an email to many different people, Jane Doe will only see her first and last name in the email, if those placeholders are used.

The “Subject” area, this will be the subject of the email.

The “Message” area. This will be the body of the email being sent out. You can add HTML and images to it just like you would a blog post.

Finally, there is a checkbox for “Save Message to Log” which is checked by default. This will save the message and its details along with when it was sent.

Once you are ready to send the message just click the “Send Message” button and emails will be sent to your attendees.

Accessing Previous Sent Messages

With the release of version 3.5.2 there is the ability to log messages. To access messages go to the event list area and you will see the link “Message Logs.” 

When you click on that link you are able to see all of the past messages sent.  From this list, you can resend the message and click on the subject to see the details you can see all of the information for the message along with who was emailed in this message.

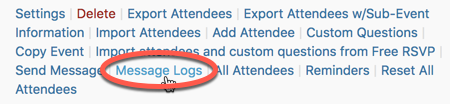
This can be useful in case you don’t want to retype messages or quickly resend a message to the same people with just a small change in the email.

  • « Go to Previous Page
  • Page 1
  • Interim pages omitted …
  • Page 3
  • Page 4
  • Page 5
  • Page 6
  • Page 7
  • Interim pages omitted …
  • Page 9
  • Go to Next Page »
  • Account
  • Announcements
  • Contact

A MachoThemes Product