This is a step-by-step guide on how to install, activate, and get the RSVP free plug-in up and running.
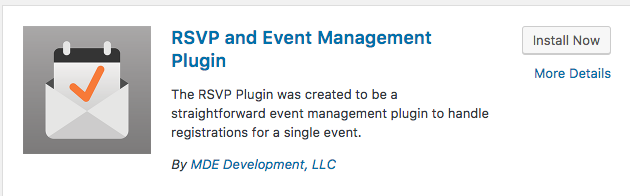
- Install the plug-in via the WordPress admin area by going to “Plugins” and clicking on, “Add New.” Search using the keyword, “RSVP” and click “Install Now” after finding the plug-in. When searching, the plug-in will appear as seen below:
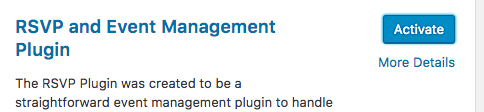
- Once it is installed, the “Install Now” button should change to “Activate”:
- Click the “Activate” button. Once activated, the RSVP plug-in will show up as a new option in the admin area. It will look as follows:

At this point the plug-in is ready to use. By default, the plug-in operates with a set attendee list meaning that only people on the list can RSVP. Before adding attendees, it is good to setup the initial RSVP options and get the form visible on the front-end.
Basic RSVP Options
From the admin area go to “RSVP Plugin” and then “RSVP Options.” Once you are there, only two fields at the top need to be set: “RSVP Open Date” and “RSVP Deadline.”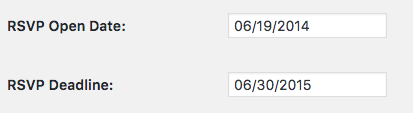
The “RSVP Open Date” field specifies the start date of when people can start to RSVP for the event. The “RSVP Deadline” field specifies when people can no longer RSVP for the event. There are many more options listed, however they are not required to make a functional RSVP area for your site. Once the dates are entered scroll to the bottom and click the “Save Changes” button.
Setting Up the Front-End
In order to get the RSVP plug-in to be visible to your invitees, a short code needs to be placed on the page or post that you want the form to be displayed. So, go to the admin area of a page or post that people will use to RSVP from and add in the short code of [rsvp]. The page editor will look something like this:
Create the page or save it if the page already exists. If the current date is between the RSVP open and deadline when viewing the page, you will be presented with a form that asks for a first and last name.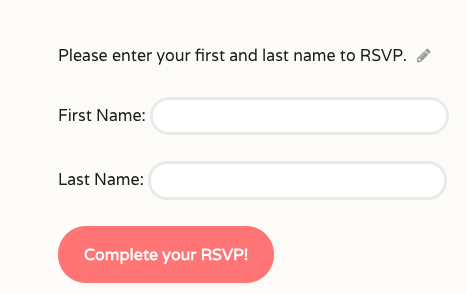
The form will look differently depending on the theme installed but the fields will still be the same. At this point, no one would be able to RSVP as a guest list has not been made.
Adding Guests
There are two ways to add guests: importing an Excel file or by manual entry. The import functionality is documented in this article. To manually enter guests, go to the admin area and then click on “RSVP Plugin” and then “Add Guest.” A form will be displayed allowing for guest information to be entered. The only fields required are the “First Name” and the “Last Name.”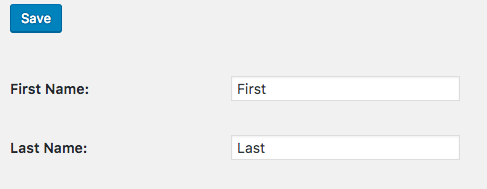
Once those fields are entered just click “save” and the following confirmation message will be displayed: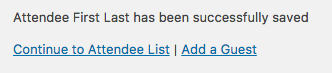
At this point we can go back to the front-end and RSVP for the new attendee we created. Happy RSVP’ing!