• Skip to main content
  • Account
  • Announcements
  • Contact

RSVP Pro Plugin

Easy RSVP and Event Management for WordPress

  • Features
  • Documentation
  • Use Cases
  • Pricing

Cristian

September 1, 2015 By Cristian

Installing The Pro Version

This article goes over the step-by-step guide on how to install and activate the RSVP Pro plugin after you have purchased it.

1) Download the plugin:

In your confirmation email, there will be a link that is similar to the one below (your version number may be different):
Email Screen Shot

Click the link and save the zip file in an easy-to-remember location.

2) Go to your WordPress admin area and then navigate to Plugins -> Add New:plugins_add_new

2a) Click on the “Upload Plugin” button at the top:
upload_plugins
2b) Click “Choose File,” followed by, “Install Now.”
choose_file_upload
install_now

3) On the new screen, click “Activate Plugin”:
activate_plugin

4) The last step is to input in your license key.  To do this, go to RSVP Pro -> License:

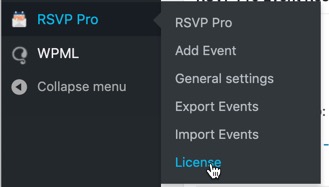
You will see the following screen:
license_key_area

Enter in your license and then click, “Save.”  After saving, you should see the green-colored word, “active” as show below:

activate_license_succesful

The next step is for you to use the plugin to manage your events!

June 30, 2015 By Cristian

Max Attendees and Waitlist Functionality

The RSVP Pro plugin was just released with a few more features that have been asked for recently. These features are the ability to set a max attendee limit and also to have a wait list. These two options can be found under each event’s general setting tab. A screen capture of the two options is shown below.

max_guest_wailist_option

The option, “Max guest limit for event,” is used to specify a guest limit it can be left blank and it is assumed there is no limit. Any positive non-zero number can be used for the guest limit. When a guest tries to be added and the limit is hit either a message will appear or they will show as having RSVP’d as “No.”

The option, “Allow for a wait list,” is used to enable the wait list. If a user tries to RSVP and the event is already at maximum capacity they can choose to say no or to be added to the wait list.

Besides these two main options there are also related text formatting options under the “text customizations” tab.

waitlist_text_customization

How did these features help you in your event? We would love to hear about it.

Does the RSVP Pro plugin not exactly fit what you need? Please get in touch and we will see what we can do for you.

Filed Under: RSVP Pro Plugin

May 6, 2015 By Cristian

Wizards, Variables and Custom Questions Oh My!

The last few months has been filled with many releases and new features. I wanted to talk about a few that have been released to the RSVP Pro plugin.

Multi-Step Registration

Probably the biggest feature was the addition of an option to change the front-end form from one long form to a wizard-like interface. Where the first step is filling out a person’s information (name, email, etc..) and the next step(s) is answering information about events. This makes the UI cleaner and user-friendly as people are not given a huge wall of options that they have to deal with. To turn on the option go to the main event’s settings then click “form customizations” then finally select the option “Change the frontend to have multiple steps” wizard_option

Once that option is turned on the front-end will now be in wizard mode which look different once a user finds their name and/or creates a new user.

Mail Message Variables

The ability to send messages to attendees is useful but there are still many ways we want to see it improved. One of the items on our list was the creation of placeholders in the subject and message. Now that is possible, you can put in placeholders for an attendees: first and last name, email address, passcode and the URL for the event.

If you are looking for additional features in the message sending functionality drop us a line we would love to hear from you.

Additional Custom Question Types

The last feature I want to mention is two new custom question types: read only and admin only. These new custom question types come from user feedback. Often people wanted to be able to display a notice mixed in with the custom questions or let attendees see a value that they couldn’t change but should be able to see, such as table assignment. The read only type allows for those scenarios.

The admin-only scenario is a different but along the same vein as read only. In some cases there might be a value that needs to be associated with the attendee but that they should never see. This is where the admin only custom question is used.


Hopefully these new features will be helpful in managing your event and attendees. If there is anything missing in the RSVP Pro plugin that you would like to see added we welcome any and all constructive feedback.

Filed Under: RSVP Pro Plugin

April 28, 2015 By Cristian

Styling the RSVP Plugin

The RSVP and RSVP Pro plugin purposely don’t do much in the way of styling. We inherit almost all styling from whatever theme is being used. The reason for this is we want to try and make everything look as similar as possible. In this post I am going to go through some of the style classes that exist in the RSVP plugins and go through one quick example that only pertains to the pro version.

The post assumes some familiarity with stylesheets and how you can use your theme’s stylesheet to modify the look and feel of the site as a whole.

Available styles

  • rsvpPlugin – ID of the main RSVP Container. Each RSVP step will be wrapped in this container
  • rsvpParagraph – Class name that is used for all paragraph tags on the front end portion of the RSVP
  • rsvpFormField – Class for divs that surround a given form input, which is a combination of a label and at least one form input (could be multiple form inputs)
  • rsvpAdditionalAttendee – Class for the div container that holds each additional RSVP attendee you are associated with
  • additionalRsvpContainer – The container that holds the plus sign that allows for people to add additional attendees
  • rsvpCustomGreeting – ID for the custom greeting div that shows up if that option is enabled
  • rsvpBorderTop – Class for setting a top border on certain divs in the main input form
  • rsvpCheckboxCustomQ – Class for the div that surrounds each custom question checkbox
  • rsvpClear – A class for div elements that we want to use to set clear both. Currently used only next to rsvpCheckboxCustomQs as they are floated
  • rsvpRsvpQuestionArea (Pro Only) – A class for the RSVP attending question

An example…

Now what would we do if we want to change the radio buttons to be more like buttons side by side in the pro plugin? Well… we would leverage the rsvpRsvpQuestionArea class to modify the styles and use the fact that the labels act as buttons for the radio buttons.  Before styling them this is what the “yes”/”no” question looks like in the plugin.

default_radio_buttons

Now let’s open up the theme’s style.css and add in the following styles

.rsvpRsvpQuestionArea input[type="radio"] {
display: none!important;
}
.rsvpRsvpQuestionArea label {
background-color: green;
color: white;
padding: 10px;
}
.rsvpRsvpQuestionArea {
display: inline-block;
height: 30px;
}

What we did here was hide the radio button, we had to use the !important keyword because the RSVP stylesheet gets loaded first and we try and prevent the radio buttons being hidden.

We then make the labels green with white text and display them side by side. The end results looks like

radios_as_buttonsThis works well but we can’t tell which item is selected. So, let’s change that!


.rsvpRsvpQuestionArea input[type="radio"]:checked + label {
background-color: blue;
}

With this added style we set the label that is next to the radio that is checked to have a background-color of blue. Which now makes the buttons look like radio_selected_buttonNow our “radio” buttons look like styled buttons.

This is just an example of how the RSVP plugin can be styled. If you are ever stuck and need some help feel free to reach out to us we are here to help.

Happy styling!

Filed Under: RSVP Plugin, RSVP Pro Plugin

February 18, 2015 By Cristian

Sub-Events and Public Attendee lists

I have been building software for awhile and it always amazes me how many different ways people want to use software. For example one feature that has been requested off and on again for a few years has been the ability to show an attendee list on a public page. This was never something I would want and not something I really would have thought of without other users’ feedback. With a recent release of the RSVP Pro plugin this feature now exists!

Now when using the paid version of the plugin you now have an additional short code that looks like [rsvppro-attendeelist id=”X”] where the  value for the id is the id for the main RSVP event. The new event list page which shows the short code looks something like.

new_event_listYou can then embed that short code on any page or post and have a list of the attendees and their RSVP status.

One thing you might notice from the above screenshot is that there are now sub-events as well. This was another feature that seemed very “duh” once user feedback was received. Some people have multiple events but share a guest list and only want one page for all events. This is what the sub-event feature allows for. Using this you can still have custom questions per-event but the guest list is shared and each user can RSVP for each specific event .

I hope you like the new features and keep the feedback coming!

Filed Under: RSVP Pro Plugin

  • « Go to Previous Page
  • Page 1
  • Interim pages omitted …
  • Page 6
  • Page 7
  • Page 8
  • Page 9
  • Go to Next Page »
  • Account
  • Announcements
  • Contact

A MachoThemes Product